


Using Forrest
A tutorial on how to use Forrest in your own projects
Introduction
This tutorial will lead you through the process of installing Forrest, and using it to create a new project, or add Forrest-based docs to an existing project.
Installing Forrest
Download the latest release of Forrest and follow the index.html in the top-level, or if you want to try the development version, then build Forrest from source.
Setting up the Environment
After downloading and extracting Forrest, you need to add environment variables. The reason for this is so that the 'forrest' command is available everywhere and it can locate its home directory and resources. It is beyond the scope of Forrest to explain how to manage your operating system. Some tips are listed below and this message explains further and provides other tips about using Windows.
In Unix/Linux:
change directory to the top-level of the forrest distribution and do ...
~/apache-forrest$ export FORREST_HOME=`pwd`
~/apache-forrest$ export PATH=$PATH:$FORREST_HOME/bin
Permanently Setting The Environment Variables for Linux/Unix
Export only changes the variables during that terminal session for that user, this is useful for testing. To permanently add the variable edit either /etc/bash.bashrc (for all users) or ~/.bash_profile (for individual users). Add these lines to the end of the file you edit:
      FORREST_HOME=/full/path/to/forrest
      export FORREST_HOME

      PATH=$PATH:$FORREST_HOME/bin
      export PATH
The Debian update-alternatives system
If your system uses the alternatives system to manage application binaries and their locations, you may use that to link Forrest into your system's binary directory, instead of explicitly exporting environment variables. To check if your system has the alternatives system installed, execute this command:
update-alternatives --version
Update-alternatives will print its version if it is installed. If so, you may then add an entry for Forrest. Installing an update-alternatives entry may need to be run with root privileges. On some systems, that can be achieved with the "sudo" command, which executes single commands as the super user: for example, Ubuntu's GNU/Linux system uses this feature. Or you may need to contact a system administrator to install.
To install a Forrest entry, first, gather the path to Forrest's executable, and also note its version. In this example, Forrest has been unpacked and placed into '/opt/Apache/apache-forrest-0.8' (the executable is at bin/forrest). Then execute this command (here we use sudo to execute update-alternatives with root privileges):
sudo update-alternatives --install /usr/bin/forrest forrest '/opt/Apache/apache-forrest-0.8/bin/forrest' 800
The arguments to this command include '/usr/bin/forrest' as the system's location for the binary link, 'forrest' as the update-alternatives short name for this entry, '/opt/Apache/apache-forrest-0.8/bin/forrest' as the actual binary's location, and '800' as the priority.
Alternatives entries have a priority because you may install other versions of Forrest, and switch among them using update-alternatives: the highest priority entry will be selected as the default until you explicitly select another one to become active. Here, we have chosen a number based on Forrest's version: version 0.8 is installed, and priority 800 leaves room for adding several other versions; for instance, 0.90 may use priority 900, and 1.0 may be 1000.
Forrest should now be available on your command line. Execute: forrest --help
Forrest should print its help text. For more help with the alternatives system, use:
update-alternatives --help or man update-alternatives
Windows 2000
Go to "My Computer", "Properties", "Advanced", "Environment Variables"
add a new variable FORREST_HOME as C:\full\path\to\apache-forrest
edit PATH as %PATH%;%FORREST_HOME%\bin
In Windows XP:
Go to "My Computer", "Properties", "Advanced", "Environment Variables"
Create a New variable with name: FORREST_HOME value: C:\full\path\to\apache-forrest
Edit PATH by adding ;%FORREST_HOME%\bin to the end of the current value.
ForrestBar
Install the ForrestBar a toolbar extension for the Firefox browser. It provides assisted navigation and search of various Forrest resources.
The 'forrest' command
To see what the 'forrest' command can do, type 'forrest -projecthelp'. The build targets that are marked with * are the commonly used ones.
  Apache Forrest.  Run 'forrest -projecthelp' to list options

  Buildfile: /usr/local/svn/forrest/src/core/bin/../forrest.build.xml

      *=======================================================*
      |                 Forrest Site Builder                  |
      |                        X.Y-dev                        |
      *=======================================================*

               Call this through the 'forrest' command

  Main targets:

   available-plugins     What plugins are available?
   available-skins       What skins are available?
   clean                 * Clean all directories and files generated during
                          the build
   init-plugins          Ensure the required plugins are available locally,
                         if any are not, download them automatically
   install-skin          Install the needed skin from the remote repository
   package-skin          Make a package of an existing skin
   run                   * Run Jetty (instant live webapp)
   run_custom_jetty      Run Jetty with configuration file found in the project
   run_default_jetty     Run Jetty with configuration file found in Forrest
   seed                  * Seeds a directory with a template project doc structure
   site                  * Generates a static HTML website for this project
   validate              Validate all: xdocs, skins, sitemap, etc
   validate-sitemap      Validate the project sitemaps
   validate-skinchoice   Validate skin choice
   validate-skinconf     Validate skinconf
   validate-skins        Validate skins
   validate-stylesheets  Validate XSL files
   validate-xdocs        Validate the project xdocs
   war                   * Generates a dynamic servlet-based website
                           (a packaged .war file)
   webapp                Generates a dynamic servlet-based website
                           (an unpackaged webapp).
   webapp-local          Generates a dynamic servlet-based website
                           (an unpackaged webapp). Note this webapp is suitable
                           for local execution only, use the 'war' or 'webapp'
                           target if you wish to deploy remotely.
  Default target: site
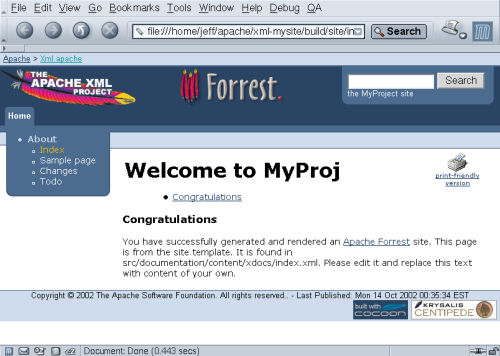
As 'site' is the default target, just running 'forrest' without options will generate a "static HTML website". For example, typing 'forrest' in the top-level "forrest/site-author" directory would build Forrest's own website. But we're going to be building a new site for your project, so read on.
Seeding a new project
'Seeding' a project is our own arborial term for adding a template documentation set to your project, which you can then customize.
To try this out, create a completely new directory (outside the Forrest distribution), then change directory to it, and do 'forrest seed'. This will give you a new site with lots of demonstration documents. You can also do "forrest seed-business", this will ask you a number of questions about the site and will create a smaller site without all the demonstration pages of the standard seed site.
If you run forrest seed you should see output like this below:
[/home/me/forrest/my-test]$ forrest seed

Apache Forrest.  Run 'forrest -projecthelp' to list options

Buildfile: /usr/local/svn/forrest/src/core/bin/../forrest.build.xml

init-props:
Loading project specific properties from
 /home/me/forrest/my-test/forrest.properties
...
echo-settings:

check-contentdir:

ensure-nocontent:

seed:
Copying 41 files to /home/me/forrest/my-test

-------------------------------
~~ Template project created! ~~

Here is an outline of the generated files:

/                        # /home/me/forrest/my-test
/forrest.properties      # Optional file describing your site layout
/src/documentation/      # Doc-specific files
/src/documentation/skinconf.xml    # Info about your project used by the skin
/src/documentation/content         # Site content.
/src/documentation/content/xdocs   # XML content.
/src/documentation/content/xdocs/index.xml # Home page
/src/documentation/content/xdocs/site.xml  # Navigation file for site structure
/src/documentation/content/xdocs/tabs.xml  # Skin-specific 'tabs' file.
/src/documentation/content/xdocs/*.html,pdf # Static content files, may have subdirs
/src/documentation/resources/images   # Project images (logos, etc)
# you can create other directories as needed (see forrest.properties)


What to do now?

- Render this template to static HTML by typing 'forrest'.
  View the generated HTML in a browser to make sure everything works.
- Alternatively 'forrest run' and browse to http://localhost:8888/ live demo.
- Start adding content in xdocs/ remembering to declare new files in site.xml
- Follow the document http://forrest.apache.org/docs/your-project.html
- Provide any feedback to dev@forrest.apache.org

Thanks for using Apache Forrest
-------------------------------

BUILD SUCCESSFUL
Total time: 5 seconds
You now have a template documentation structure all set up:
[/home/me/forrest/my-test]$ tree
.
|-- build
|   `-- tmp
|       `-- projfilters.properties
|-- forrest.properties
|-- src
|   `-- documentation
|       |-- README.txt
|       |-- classes
|       |   `-- CatalogManager.properties
|       |-- content
|       |   `-- xdocs
|       |       |-- images
|       |       |   |-- group-logo.gif
|       |       |   |-- group.svg
|       |       |   |-- icon.png
|       |       |   |-- project-logo2.png
|       |       |   `-- project.svg
|       |       |-- index.xml
|       |       |-- samples
|       |       |   |-- ascii-art.xml
|       |       |   |-- cocoon-pyramid.aart
|       |       |   |-- faq.xml
|       |       |   |-- ihtml-sample.ihtml
|       |       |   |-- index.xml
|       |       |   |-- openoffice-writer.sxw
|       |       |   |-- sample.xml
|       |       |   |-- sample2.xml
|       |       |   |-- sdocbook.xml
|       |       |   |-- subdir
|       |       |   |   |-- book-sample.xml
|       |       |   |   `-- index.xml
|       |       |-- site.xml
|       |       |-- tabs.xml
|       |       |-- hello.pdf
|       |       |-- test1.html
|       |       `-- test2.html
|       `-- resources
|           `-- images
|           `-- schema
|           `-- stylesheets
|       |-- sitemap.xmap
|       |-- skinconf.xml
|       `-- translations
|           |-- langcode.xml
|           |-- languages_en.xml
|           |-- languages_es.xml
|           |-- menu.xml
|           |-- menu_af.xml
|           |-- menu_de.xml
|           |-- menu_es.xml
|           |-- menu_it.xml
|           |-- menu_no.xml
|           |-- menu_ru.xml
|           |-- menu_sk.xml
|           |-- tabs.xml
|           `-- tabs_es.xml
To render this to HTML, type 'forrest'. You should have a HTML site rendered into the build/site directory:
Practise with adding new content. Change to the directory src/documentation/content/xdocs and copy the file index.xml to create my-new-file.xml as a new document. Edit it to change some text. Add an entry to site.xml by copying one of the other entries and changing it to suit. Now do 'forrest' to see the result.
Seeding an existing project
In the section above, we have run 'forrest seed' in an empty directory to create a new project. If you have an existing codebase to which you want to add Forrest docs, then run 'forrest seed' in your project base directory, and the Forrest doc structure will be grafted onto your project. This procedure only needs to be done once.
If your project already has XML documentation, it may be easier to tell Forrest where the XML sources are, rather than rearrange your project directories to accommodate Forrest. This can be done by editing forrest.properties (consult the Changing the layout section for more details).
Customizing your project
Having seeded a project with template docs, you will now want to customize it to your project's needs. Here we will deal with configuring the skin, and changing the project layout.
Configuring the Forrest skin: skinconf.xml
Most Forrest skins can be customized through a single XML file, src/documentation/skinconf.xml, which looks like the following example. Warning: The following example might be out-of-date. Obtain a recent configuration file from a new 'forrest seed' site.
<!--
Skin configuration file. This file contains details of your project,
which will be used to configure the chosen Forrest skin.
-->

 <!DOCTYPE skinconfig PUBLIC
        "-//APACHE//DTD Skin Configuration V0.8-2//EN"
        "skinconfig-v08-2.dtd">

<skinconfig>
  <!-- To enable lucene search add provider="lucene"
    Add box-location="alt" to move the search box to an alternate location
    (if the skin supports it) and box-location="all" to show it in all
    available locations on the page.  Remove the <search> element to show
    no search box.
  -->
  <search name="MyProject" domain="example.org"/>

  <!-- Disable the print link? If enabled, invalid HTML 4.0.1 -->
  <disable-print-link>true</disable-print-link>
  <!-- Disable the PDF link? -->
  <disable-pdf-link>false</disable-pdf-link>
  <!-- Disable the xml source link? -->
  <!-- The xml source link makes it possible to access the xml rendition
    of the source frim the html page, and to have it generated statically.
    This can be used to enable other sites and services to reuse the
    xml format for their uses. Keep this disabled if you don't want other
    sites to easily reuse your pages.-->
  <disable-xml-link>true</disable-xml-link>

  <!-- Disable navigation icons on all external links? -->
  <disable-external-link-image>false</disable-external-link-image>

  <!-- Disable w3c compliance links? -->
  <disable-compliance-links>false</disable-compliance-links>
  <!-- Render mailto: links unrecognisable by spam harvesters? -->
  <obfuscate-mail-links>true</obfuscate-mail-links>

  <!-- mandatory project logo
       skin: forrest-site renders it at the top -->
  <project-name>MyProject</project-name>
  <project-description>MyProject Description</project-description>
  <project-url>http://example.org/myproj/</project-url>
  <project-logo>images/project-logo2.png</project-logo>
  <!-- Alternative static image:
  <project-logo>images/project-logo2.png</project-logo> -->

  <!-- optional group logo
       skin: forrest-site renders it at the top-left corner -->
  <group-name>MyGroup</group-name>
  <group-description>MyGroup Description</group-description>
  <group-url>http://example.org</group-url>
  <group-logo>images/group.png</group-logo>
  <!-- Alternative static image:
  <group-logo>images/group-logo.gif</group-logo> -->

  <!-- optional host logo (e.g. sourceforge logo)
       skin: forrest-site renders it at the bottom-left corner -->
  <host-url></host-url>
  <host-logo></host-logo>

  <!-- relative url of a favicon file, normally favicon.ico -->
  <favicon-url></favicon-url>

  <!-- The following are used to construct a copyright statement -->
  <year>2005</year>
  <vendor>The Acme Software Foundation.</vendor>
  <!-- The optional copyright-link URL will used as a link in the
    copyright statement
  <copyright-link>http://www.apache.org/licenses/</copyright-link>
  -->

  <!-- Some skins use this to form a 'breadcrumb trail' of links.
    If you don't want these, then set the attributes to blank.
    The DTD purposefully requires them.
    Use location="alt" to move the trail to an alternate location
    (if the skin supports it).
  -->
  <trail>
    <a1 name="myGroup" href="http://www.apache.org/"/>
    <a2 name="myProject" href="http://forrest.apache.org/"/>
    <a3 name="" href=""/>
  </trail>

  <!-- Configure the TOC, i.e. the Table of Contents.
  @max-depth
   how many "section" levels need to be included in the
   generated Table of Contents (TOC).
  @min-sections
   Minimum required to create a TOC.
  @location ("page","menu","page,menu")
   Where to show the TOC.
  -->
  <toc max-depth="2" min-sections="1" location="page"/>

  <!-- Heading types can be clean|underlined|boxed  -->
  <headings type="boxed"/>

  <extra-css>
    <!-- A sample to show how the class attribute can be used -->
    p.quote {
      margin-left: 2em;
      padding: .5em;
      background-color: #f0f0f0;
      font-family: monospace;
    }
  </extra-css>

  <colors>
  <!-- CSS coloring examples omitted for brevity -->
  </colors>

  <!-- Settings specific to PDF output.  -->
  <pdf>
    <!--
       Supported page sizes are a0, a1, a2, a3, a4, a5, executive,
       folio, legal, ledger, letter, quarto, tabloid (default letter).
       Supported page orientations are portrait, landscape (default
       portrait).
       Supported text alignments are left, right, justify (default left).
    -->
    <page size="letter" orientation="portrait" text-align="left"/>

    <!--
       Margins can be specified for top, bottom, inner, and outer
       edges. If double-sided="false", the inner edge is always left
       and the outer is always right. If double-sided="true", the
       inner edge will be left on odd pages, right on even pages,
       the outer edge vice versa.
       Specified below are the default settings.
    -->
    <margins double-sided="false">
      <top>1in</top>
      <bottom>1in</bottom>
      <inner>1.25in</inner>
      <outer>1in</outer>
    </margins>

    <!--
      Print the URL text next to all links going outside the file
    -->
    <show-external-urls>false</show-external-urls>
  </pdf>

  <!-- Credits are typically rendered as a set of small clickable
    images in the page footer -->
  <credits>
    <credit>
      <name>Built with Apache Forrest</name>
      <url>http://forrest.apache.org/</url>
      <image>images/built-with-forrest-button.png</image>
      <width>88</width>
      <height>31</height>
    </credit>
    <!-- A credit with @role='pdf' will have its name and url
      displayed in the PDF page's footer. -->
  </credits>

</skinconfig>
Customise this file for your project. The images/ directory mentioned in 'project-logo' and 'group-logo' elements corresponds to the src/documentation/resources/images directory (this mapping is done automatically by the sitemap).
Having edited this file (and ensured it is valid XML), re-run the 'forrest' command in the site root, and the site would be updated.
Changing the layout: forrest.properties
Forrest allows you to place files anywhere you want in your project, so long as you tell Forrest where you have placed the major file types.
The forrest.properties file maps from your directory layout to Forrest's. If you generated your site with 'forrest seed', you will have one pre-written, with all the entries commented out.
The main entries (with default values) are:
# Properties that must be set to override the default locations
#
# Parent properties must be set. This usually means uncommenting
# project.content-dir if any other property using it is uncommented

#project.content-dir=src/documentation
#project.conf-dir=${project.content-dir}/conf
#project.sitemap-dir=${project.content-dir}
#project.xdocs-dir=${project.content-dir}/content/xdocs
#project.resources-dir=${project.content-dir}/resources
#project.stylesheets-dir=${project.resources-dir}/stylesheets
#project.images-dir=${project.resources-dir}/images
#project.schema-dir=${project.resources-dir}/schema
#project.skins-dir=${project.content-dir}/skins
#project.skinconf=${project.content-dir}/skinconf.xml
#project.lib-dir=${project.content-dir}/lib
#project.classes-dir=${project.content-dir}/classes
For example, if you wish to keep XML documentation in src/xdocs rather than src/documentation/content/xdocs simply change the definition for project.xdocs-dir
project.xdocs-dir=src/xdocs
For example, to emulate the simple Maven format:
         /xdocs
         /xdocs/images
         /xdocs/stylesheets
Here are the required property definitions:
project.content-dir=xdocs
project.sitemap-dir=${project.content-dir}
project.xdocs-dir=${project.content-dir}
project.stylesheets-dir=${project.content-dir}/stylesheets
project.images-dir=${project.content-dir}/images
project.skinconf=${project.content-dir}/skinconf.xml
Adding content
Now you can start adding content of your own, in src/documentation/content/xdocs
site.xml
When adding a new xml document, you would add an entry to the project's site.xml file. This site.xml is like a site index, and is rendered as the vertical column of links in the default skin. Look at Forrest's own xdocs for an example. More detailed info about site.xml is provided in the document Menus and Linking.
tabs.xml
The tabs.xml file is used to produce the 'tabs'. which enable users to quickly jump to sections of your site. See the menu generation documentation for more details, and again, consult Forrest's own docs for a usage example.
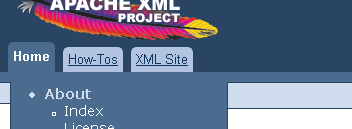
You can have one or two levels of tabs. The images above show a single level. However, you can create a second level that will only be displayed when its parent tab is selected. For example, the tabs.xml snippet below will display either one or two rows of tabs, depending on which of the top level tabs is selected. The first row will have two tabs: one labelled How-Tos and the other labelled Apache XML Projects. When the How-Tos tab is selected there will be no second row of tabs. However, when the Apache XML Projects tab is selected, a second row of tabs will be displayed below the first.
  <tab label="How-Tos" dir="community/howto/"/>
  <tab label="Apache XML Projects" href="http://xml.apache.org">
    <tab label="Forrest" href="http://forrest.apache.org/"/>
    <tab label="Xerces" href="http://xml.apache.org/xerces"/>
  </tab>
Images
Images usually go in the resources/images/ directory. The default sitemap maps this directory to images/ so image tags will typically look like <figure src="images/project-logo2.png" alt="Project Logo"/>
Advanced customizations: sitemap.xmap
The Cocoon sitemap is a set of rules for generating content (HTML, PDFs etc) from XML sources. Forrest has a default sitemap, which is adequate for everyday sites. For example, the Forrest website itself uses the default sitemap.
Sometimes, one needs to go beyond the default set of rules. This is where Forrest really shines, because its Cocoon backend allows virtually any processing pipeline to be defined. For example, one can:
- Transform custom XML content types with XSLT stylesheets.
- Generate PNG or JPEG images from SVG XML files. (Note: Forrest's sitemap now does this natively.)
- Integrate external XML feeds (e.g. RSS) into your site's content. (Note: See issues.xmap for an example.)
- Merge XML sources via aggregation, or make content from large XML sources available as "virtual" files. (Note: Forrest makes extensive use of aggregation in the default sitemaps. It also defines a whole-site HTML and PDF, available as the standard names wholesite.html and wholesite.pdf.)
- Read content from exotic sources like XML databases.
- Integrate any of Cocoon's vast array of capabilities. The possibilities are best appreciated by downloading the latest Cocoon distribution and playing with the samples.
The Forrest sitemaps are at main/webapp/*.xmap
You can add pre-processing sitemaps to your project src/documentation directory (or wherever ${project.sitemap-dir} points to). Get a copy of a simple sitemap.xmap from a 'forrest seed site'.
Any match that is not handled, passes through to be handled by the default Forrest sitemaps - obviously extremely powerful. The capability is described in "Using project sitemaps" and some worked examples are shown in the following sections here.
Example: Adding a new content type
There are two methods for detecting types of documents and doing special handling. The more complete solution is described in the advanced section below. However, this basic method is also worth understanding.
Follow this worked example. In a fresh directory do 'forrest seed' then follow the steps described in this section.
An example scenario is that we have a specialised list of downloads for a certain software package. It would be best to represent the download information in a custom XML format. This means that it will have its own document type declaration. We will need to detect this new document type via our project sitemap and also provide a mapping to a local copy of this DTD.
<?xml version="1.0" encoding="utf-8"?>
<!DOCTYPE document PUBLIC "-//Acme//DTD Download Documentation V1.0//EN"
  "dtd/download-v10.dtd">
<document>
  <header>
    <title>Downloading Binaries</title>
  </header>
  <body>
    <section id="download">
      <title>Downloading binaries</title>
      <p>
        Here are the binaries for FooProject
      </p>
      <release version="0.9.13" date="2002-10-11">
        <downloads>
          <file
            url="http://prdownloads.sf.net/aft/fooproj-0.9.13-bin.zip?download"
            name="fooproj-0.9.13-bin.zip"
            size="5738322"/>
          <file
            url="http://prdownloads.sf.net/aft/fooproj-0.9.13-src.zip?download"
            name="fooproj-0.9.13-src.zip"
            size="10239777"/>
        </downloads>
      </release>
      <release version="0.9.12" date="2002-10-08">
        <downloads>
          <file
            url="http://prdownloads.sf.net/aft/fooproj-0.9.12-src.zip?download"
            name="fooproj-0.9.12-src.zip"
            size="10022737"/>
         </downloads>
       </release>
    </section>
    <section id="cvs">
      <title>Getting FooProject from CVS</title>
      <p>....</p>
    </section>
  </body>
</document>
This file called "download.xml" would be placed in your content directory (typically src/documentation/content/xdocs) and an entry added to site.xml
To handle these special tags, one would write a stylesheet to convert them to the intermediate Forrest xdocs structure. Here is such a stylesheet, called "download-to-document.xsl" ...
<?xml version="1.0" encoding="utf-8"?>
<xsl:stylesheet
  version="1.0"
  xmlns:xsl="http://www.w3.org/1999/XSL/Transform">

  <xsl:template match="release">
    <section id="{@version}">
      <title>Version <xsl:value-of select="@version"/> (released
          <xsl:value-of select="@date"/>)</title>
      <table>
        <tr><th>File</th><th>Size</th></tr>
        <xsl:apply-templates select="downloads/*"/>
      </table>
    </section>
  </xsl:template>

  <xsl:template match="file">
    <tr>
      <td><a href="{@url}"><xsl:value-of select="@name"/></a></td>
      <td><xsl:value-of
           select="format-number(@size div (1024*1024), '##.##')"/> MB</td>
    </tr>
  </xsl:template>

  <xsl:template match="@* | node() | comment()">
    <xsl:copy>
      <xsl:apply-templates select="@*"/>
      <xsl:apply-templates/>
    </xsl:copy>
  </xsl:template>

</xsl:stylesheet>
Place this file in the default stylesheets directory, src/documentation/resources/stylesheets (or wherever ${project.stylesheets-dir} points).
Now we will create a project sitemap to control the transformation of our custom xml structure into the Forrest intermediate xdocs structure.
Add the following match to the file src/documentation/sitemap.xmap ...
<?xml version="1.0"?>
<map:sitemap xmlns:map="http://apache.org/cocoon/sitemap/1.0">
 <map:pipelines>
  <map:pipeline>
  ...


   <map:match pattern="**download.xml">
    <map:generate src="{properties:content.xdocs}{1}download.xml" />
    <map:transform src="{properties:resources.stylesheets}/download-to-document.xsl" />
    <map:serialize type="xml"/>
   </map:match>


  </map:pipeline>
 </map:pipelines>
</map:sitemap>
That will intercept the request for the body content, for only this specific "download" document, and will transform it into the intermediate Forrest "document" format. The normal Forrest machinery will handle the aggregation with navigation menus etc. and will apply the normal skin.
Registering a new DTD
By default, Forrest requires that all XML files be valid, i.e. they must have a DOCTYPE declaration and associated DTD, and validate against it. Our new 'downloads' document type is no exception. The XML Validation document continues this example, showing how to register a new document type. Briefly, this involves:
- Create a new DTD or (in our case) extend an existing one.
- Place the new DTD in the ${project.schema-dir}/dtd directory.
- Add an XML Catalog to enable a mapping from the DOCTYPE public id to the relevant DTD file.
- Tell the system about your catalog.
Example: Adding a new content type (advanced)
The simple user sitemap in the previous example is fine for simple situations. For a complete solution to the "Download DTD" issue we need a more advanced sitemap which will do different processing depending on the type of the source document.
We need to digress and explain the powerful SourceTypeAction (content aware pipelines). It is a Cocoon sitemap component that peeks at the top-part of a document to look for hints about the type of the document. It has four methods: document-declaration, document-element and namespace, processing-instruction, w3c-xml-schema.
Now to return to our specific example which uses SourceTypeAction to detect the Document Type Declaration. Let us show the sitemap and then explain it.
<?xml version="1.0"?>
<map:sitemap xmlns:map="http://apache.org/cocoon/sitemap/1.0">

 <map:components>
  <map:selectors default="parameter">
   <map:selector logger="sitemap.selector.parameter"
       name="parameter" src="org.apache.cocoon.selection.ParameterSelector" />
  </map:selectors>
  <map:actions>
   <map:action logger="sitemap.action.sourcetype" name="sourcetype"
       src="org.apache.forrest.sourcetype.SourceTypeAction">
    <sourcetype name="download-v1.0">
     <document-declaration
        public-id="-//Acme//DTD Download Documentation V1.0//EN" />
    </sourcetype>
    <sourcetype name="download-v1.1">
     <document-declaration
        public-id="-//Acme//DTD Download Documentation V1.1//EN" />
    </sourcetype>
   </map:action>
  </map:actions>
 </map:components>

 <map:pipelines>
  <map:pipeline>
   <map:match pattern="**download.xml">
    <map:generate src="{properties:content.xdocs}{1}download.xml" />
    <map:act type="sourcetype" src="{properties:content.xdocs}{1}download.xml">
     <map:select type="parameter">
      <map:parameter name="parameter-selector-test" value="{sourcetype}" />
      <map:when test="download-v1.0">
       <map:transform
          src="{properties:resources.stylesheets}/download-to-document.xsl" />
      </map:when>
      <map:when test="download-v1.1">
       <map:transform
          src="{properties:resources.stylesheets}/downloadv11-to-document.xsl" />
      </map:when>
     </map:select>
    </map:act>
    <map:serialize type="xml"/>
   </map:match>
  </map:pipeline>
 </map:pipelines>
</map:sitemap>
This is the type of processing that happens in the main main/webapp/forrest.xmap sitemap. We have added similar handling to our project sitemap. Basically, this uses the SourceTypeAction (content aware pipelines) to detect the doctype. The new download-v11.dtd needs to be also added to your project Catalog as described above.
Note that any sitemap component must be declared before it can be used, because the project sitemap is the first sitemap to be consulted.
Example: integrating external RSS content
Similar to the previous example, we can integrate RSS into our site simply by providing a match in our project sitemap.xmap ...
<?xml version="1.0"?>
<map:sitemap xmlns:map="http://apache.org/cocoon/sitemap/1.0">
 <map:pipelines>
  <map:pipeline>

   <map:match pattern="**weblog.xml">
    <map:generate src="http://blogs.cocoondev.org/stevenn/index.rss"/>
    <map:transform src="{forrest:forrest.stylesheets}/rss-to-document.xsl"/>
    <map:serialize type="xml"/>
   </map:match>


   <map:match pattern=".......">
    <!-- handle other project-specific matches -->
   </map:match>
  </map:pipeline>
 </map:pipelines>
</map:sitemap>
You will probably want to copy the core Forrest rss-to-document.xsl to your project, customise it to your needs, and refer to it with src="{properties:resources.stylesheets}/rss-to-document.xsl". Then of course you would add an entry to site.xml to link to weblog.html
Forrest skins
As Forrest separates content from presentation, we can plug in different "skins" to instantly change a site's look and feel. Forrest provides one primary skin, pelt, and some others in various states of development.
To change the skin, edit the forrest.properties file to set project.skin=pelt or some other skin name. If running in dynamic mode you need to restart Forrest in order to see the new skin.
Configuration of skins
All configuration is done via your project src/documentation/skinconf.xml file. It contains many comments to describe each capability. Please read those, there is no point repeating here.
Defining a new skin
Consider discussing your needs on the mailing lists. There may be planned enhancements to the core skins. Also consider contributing your extensions to the core skins, rather than write your own skin. Bear in mind that you could be creating an update and management issue. Anyway, ...
Projects can define their own skin in the src/documentation/skins directory (or wherever ${project.skins-dir} points). The default sitemap assumes a certain skin layout, so the easiest way to create a new skin is by copying an existing Forrest skin. For example, copy main/webapp/skins/pelt to your project area at src/documentation/skins/my-fancy-skin and add project.skin=my-fancy-skin to forrest.properties
The two most interesting XSLT stylesheets involved are:
- xslt/html/document-to-html.xsl
- This stylesheet is applied to individual Forrest xdocs XML files, and converts them to HTML suitable for embedding in a larger HTML page.
- xslt/html/site-to-xhtml.xsl
- This stylesheet generates the final HTML file from an intermediate 'site' structure produced by the other stylesheets. It defines the general layout, and adds the header and footer.
Typically there is a lot of commonality between skins. XSLT provides an 'import' mechanism whereby one XSLT can extend another. Forrest XSLTs typically 'import' from a common base:
<xsl:stylesheet version="1.0" xmlns:xsl="http://www.w3.org/1999/XSL/Transform">

  <xsl:import href="lm://transform.skin.common.html.document-to-html"/>

  ... overrides of default templates ...

</xsl:stylesheet>
Notice the use of the lm protocol in the import statement. The lm protocol directs Forrest to use the locationmap to resolve the location of the indicated stylesheet. If you trace this call through the sitemap, you will find the following section of main/webapp/locationmap-transforms.xml:
    <match pattern="transform.skin.*.*.*">
      <select>
        <location src="{properties:skins-dir}/{1}/xslt/{2}/{3}.xsl"/>
        <location src="{forrest:forrest.context}/skins/{1}/xslt/{2}/{3}.xsl"/>
      </select>
    </match>
This means that the locationmap first checks your project space (according to the ${project.skins-dir} property of your forrest.properties file) and, if the file is not found there, it then checks in your installation of Forrest.
Interactive Forrest: faster turnaround when developing your docs
In comparison to simpler tools (like Anakia) the Cocoon command-line mode (and hence Forrest command-line mode) is slow. As the dream list notes, Forrest was originally intended to be used for dynamic sites, and the Cocoon crawler used only to create static snapshots for mirroring. This section describes how, by using a "live" Forrest webapp instance, the Forrest-based documentation development can be faster and easier than with comparable tools.
Running as a webapp
Type 'forrest run' in your project root to start Forrest's built-in Jetty web server. Once it has started, point your browser at http://localhost:8888/, which will show your website, rendered on demand as each link is followed.
(Alternatively, if you wish to run Forrest from within an existing servlet container, type forrest webapp to build an open webapp in build/webapp/)
Using the webapp
You can now edit the XML content in build/webapp/content/xdocs and see the changes immediately in the browser.
Invoking Forrest from Ant
Ant has an <import> task which can be used to invoke Forrest from Ant. All targets and properties are imported and can be used in your project build. Here is a simple example:
<project name="myproject" default="hello">
     <!-- FORREST_HOME must be set as an environment variable -->
     <property environment="env"/>
     <property name="forrest.home" value="${env.FORREST_HOME}"/>
     <import file="${env.FORREST_HOME}/main/forrest.build.xml"/>

     <!-- 'site' is a target imported from forrest.build.xml -->
     <target name="post-build" depends="site">
       <echo>something here</echo>
     </target>
</project>
Because you are using your own version of Ant to do Forrest's work, you will need to provide the supporting catalog entity resolver: 'cp forrest/lib/core/xml-commons-resolver-1.1.jar $ANT_HOME/lib'
Note: The technique described above requires Ant 1.6+ otherwise the <import> task will not be available for you to use. Forrest bundles the latest version of Ant, so you can invoke your project like this: 'forrest -f myproject.xml'. This will not run the 'forrest' command. It will just use Forrest's Ant and resolver to execute your buildfile.
Another option is to use the Forrest Antlet from the Krysalis Project's Antworks Importer.
The Forrestbot provides workstages to get source, build, deploy, and notify. This is very useful for automating builds; you may want to consider using the Forrestbot.